Autel MK908 II/ MK908 Pro II Diagnosis & Coding Instruction
Read this article to learn how to use Autel MaxiCOM MK908 II/ MK908 PRO II diagnosis & coding function.
This is guide you how to use Autel MaxiCOM MK908 II/ MK908 PRO II diagnosis & coding function. The content introduced auto scan, trouble codes, live data, active test, special functions and ECU coding, etc. - Diagnosis
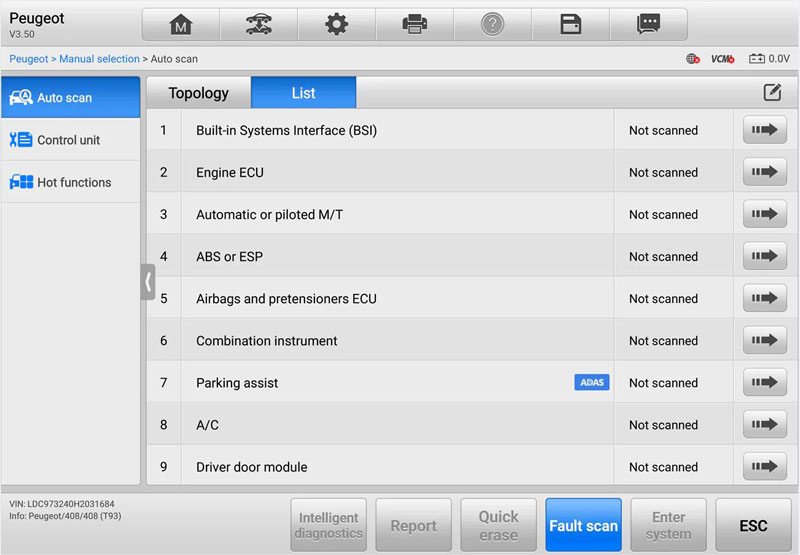
The Auto Scan function performs a comprehensive scanning over all systems on the vehicle’s ECU in order to locate fault systems and retrieve DTCs.
- Control Unit
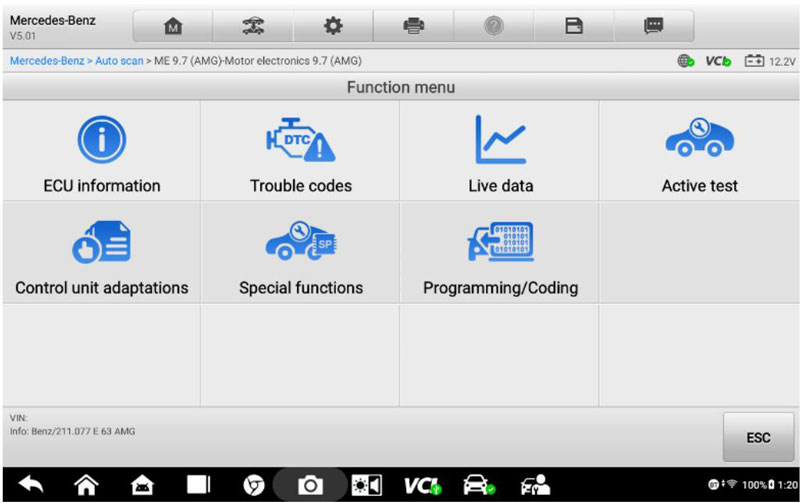
This option allows you to manually locate a required control system for testing. The Function Menu options vary slightly for different vehicles. The function menu may include: ECU information, trouble codes, live data, active test, special functions.
- ECU Information
Autel MK908 II provides the retrieved ECU information in detail. Selecting it opens an information screen, including unit type, version numbers, and other specifications.
How to perform a diagnostic function?
1) Establish communication with the test vehicle via the VCI.
2) Identify the test vehicle by selecting from the menu options.
3) Locate the required system for testing by "Auto Scan" or through menu driven selections in Control Unit.
4) Select the desired test from the Function Menu screen.
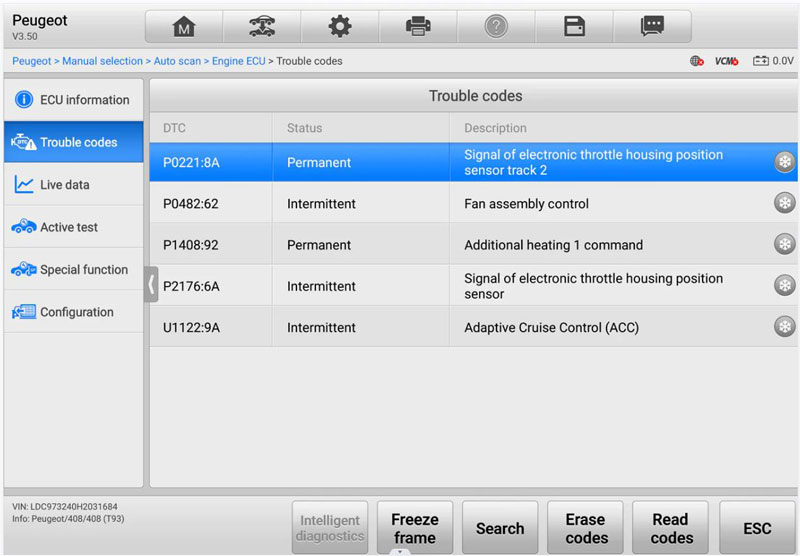
- Trouble Codes
| Name | Description |
| DTC Guide | Checks the related help information. |
| Freeze Frame | Displays when freeze frame data is available for viewing. Tap the icon to display a data screen. The Freeze Frame interface is similar to the Read Codes interface and shares similar operations. |
| Search | Searches the selected DTC for additional information on the Internet. |
| Erase Codes | Erases codes from the ECU. It is recommended that DTCs are read and needed repairs are performed before erasing codes. |
| Read Codes | Retrieves and displays the DTCs from the vehicle control system. The Read Codes screen varies for each vehicle being tested. |
| ESC | Returns to the previous screen or exit Trouble Code. |
- Read Codes
MK908 II/ MK908 PRO II retrieves and displays the DTCs from the vehicle's control system. The Read Codes screen varies for each vehicle being tested on some vehicles, freeze frame data can also be retrieved for viewing.
- Erase Codes
After reading the retrieved codes from the vehicle and making repairs, you can erase the codes from the vehicle using this function. Before performing this function, make sure the vehicle's ignition key is in the ON (RUN) position with the engine off.
How to erase codes?
1) Tap "Trouble Codes" from the Function Menu.
2) Tap "Erase Codes". A warning message displays to inform you of data loss when this function is applied: Tap "Yes" to continue, "No" to exit.
3) Tap "ESC" on the confirming screen to exit Erase Codes.
4) Check the Read Codes function again to ensure the operation is successful.
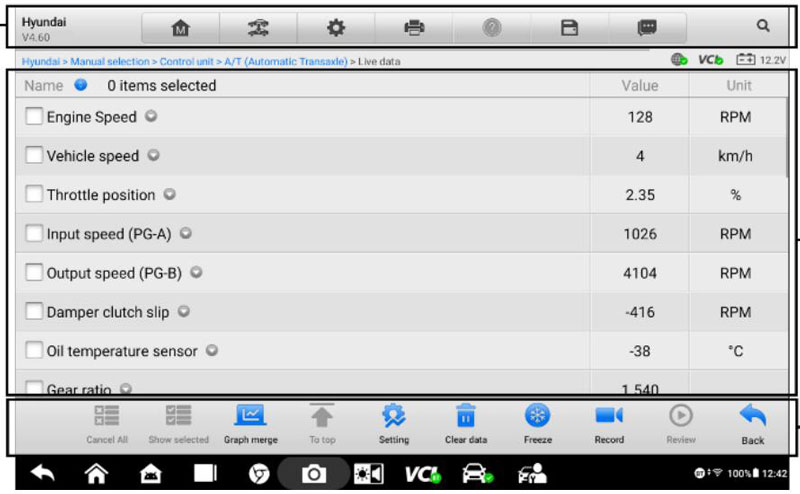
- Live Data
Gesture scrolling allows you to quickly move through the data list. Simply swipe the screen up or down to reposition the parameters being displayed if the data covers more than one screen. The figure below shows a typical Live Data screen:
How to change the Unit mode?
Tap the "Settings" button in the top toolbar and select a required mode. See Units for more information.
What's display mode?
There are 4 types of display modes available for data viewing, allowing you to view various types of parameters in the most suitable way for data check-ups. Tap the drop-down button on the right side of a parameter to open a submenu. A total of 7 buttons will be displayed:
The 4 buttons on the left represent different data display modes, plus an "Information" button (active when additional information is available), an "Unit Change" button (for switching the unit of displayed data), and a "Trigger" button (tap to open the "Trigger Settings" window).
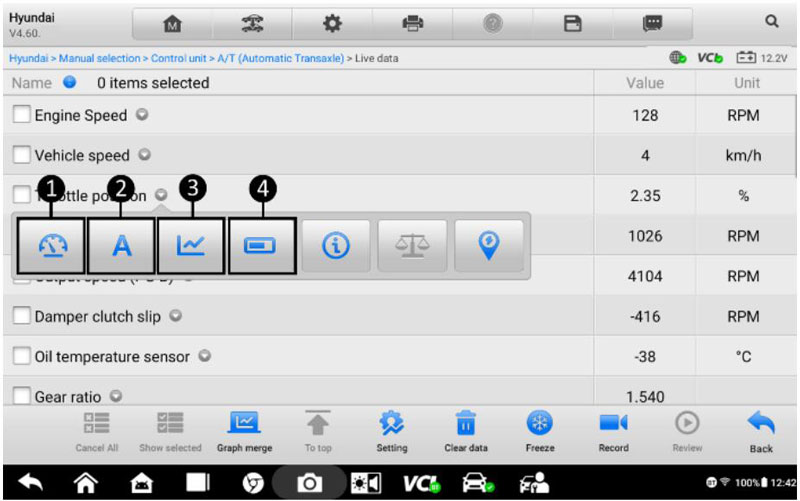
Each parameter item displays the selected mode independently.
- Analog Gauge Mode — displays the parameters in gauge charts.
- Text Mode — the default mode that displays the parameters as a text list.
- (Note: Some status parameters, such as a switch reading, like ON, OFF, ACTIVE and ABORT, etc., can only be displayed in Text Mode. Others, such as a sensor reading, can be displayed in both text and graph modes.)
- Waveform Mode — displays the parameters in waveform graphs. In this mode, five control buttons will appear to the right of the parameter, allowing you to manipulate the display status.
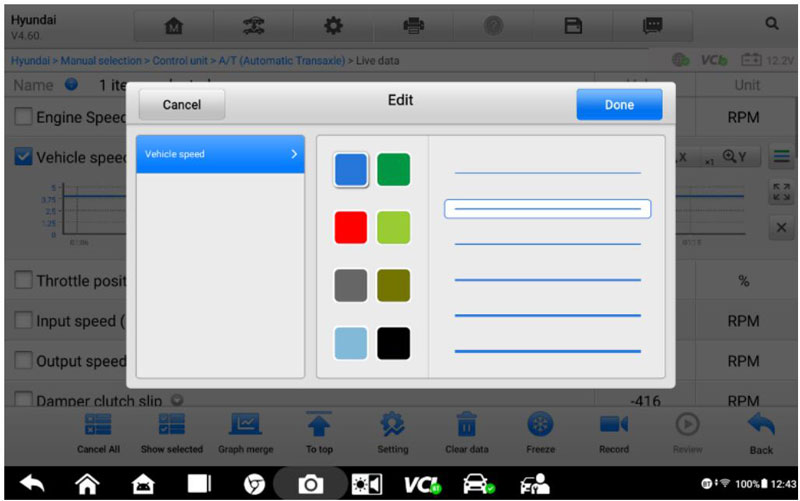
Full Screen Display — this option is only available in waveform mode, and mostly used in Graph Merge status for data comparison.
(Note: In full screen display, you can edit the waveform's color and line thickness by tapping the "Edit" button on the upper-right side of the screen.)
- Active Test
During an active test, the tester outputs commands to the ECU in order to drive the actuators. This test determines the integrity of the system or parts by reading the engine ECU data, or by monitoring the operation of the actuators, such as toggling a solenoid, relay, or switch between two operating states.
Selecting "Active Test" opens a menu of test options that varies by make and model. Selecting a menu option activates the test. Follow on-screen instructions while performing tests. How and what information is presented on the screen varies according to the type of test being performed. Some toggle and variable control tests display Active Test Controls at the top of the screen with data stream information below, or vice versa.
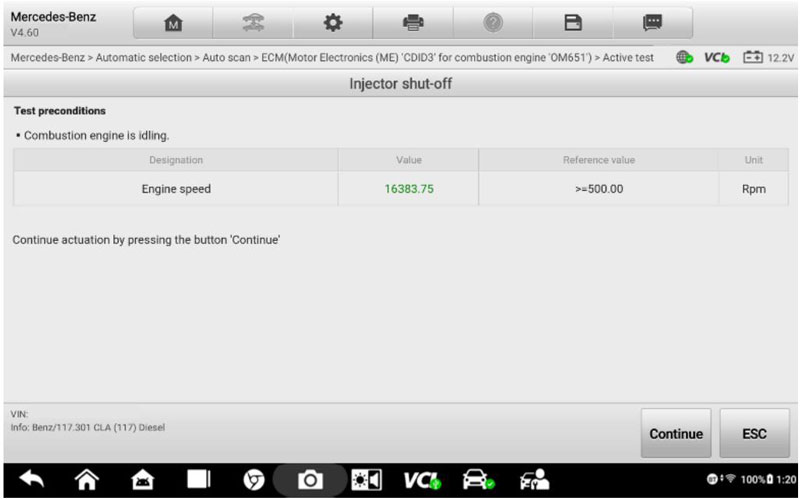
The function buttons at the lower-right corner of the Active Test screen manipulate the test signals. The operational instructions are displayed on the main section of the test screen. Simply follow the on-screen instructions and make appropriate selections to complete the tests. Each time when an operation is successfully executed, the message such as “Command Finished”, “Activation Successful” or something similar displays.
Tap the "ESC" function button to exit the test when finished.
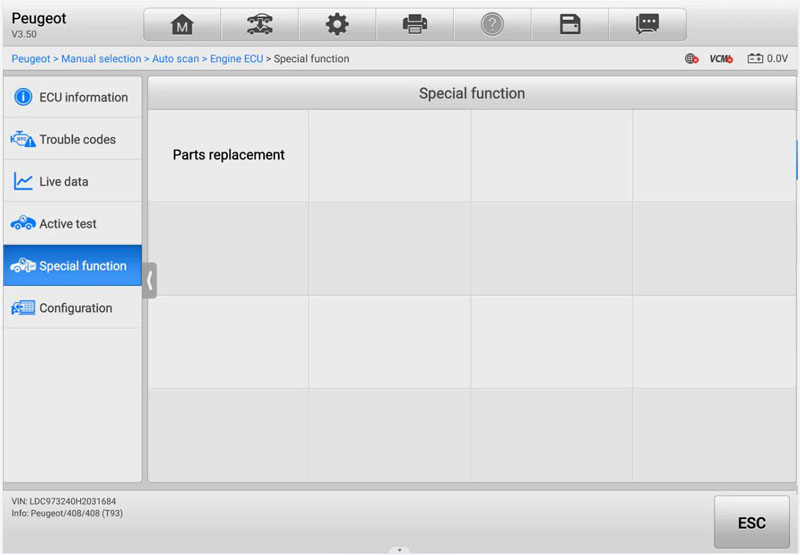
- Special Functions
Read the information carefully and check the vehicle condition accordingly, when you are sure that the vehicle is ready to perform the adaptation, simply follow the instruction provided to make appropriate selections. When the operation is done, an execution status message such as Completed, Finished or Successful, displays.
Tap the "ESC" button to exit the function.
- Coding
- Drivability
- Fuel Efficiency
- Power Loss
- Fault Codes
- Durability of Mechanical Parts
The Coding function is used to re-flash the vehicle control modules, it allows you to update the computer software on the vehicle to the latest version, as well as to reprogram adaptive data for certain components after making repairs or replacements.
Available coding operations vary by the test vehicle, and only the available operations display in the menu.
Selecting the Coding function opens a menu of operation options that varies by make and model. Follow all screen instructions while performing the coding operations. How and what information is presented on the screen varies according to the type of operation being performed.
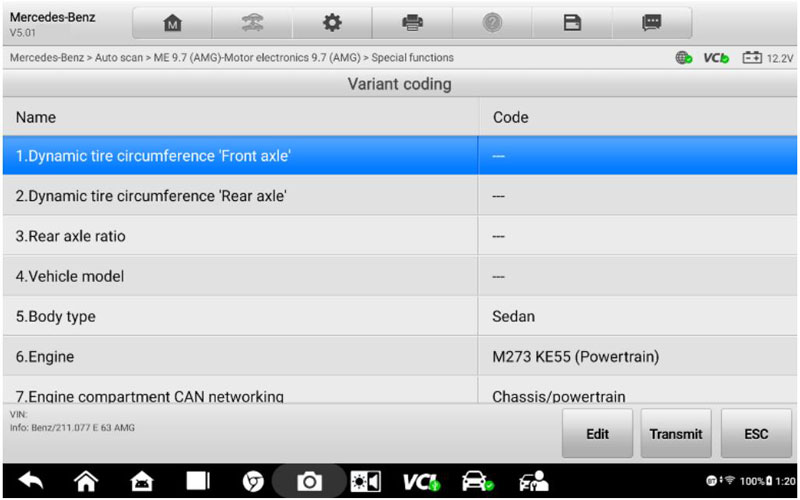
How to do variant coding?
Check the vehicle condition and the coding information carefully, and use the function buttons to edit Codes for the corresponding components. Tap "Send" when you finish editing all the items. When the operation is complete, status message (Completed, Finished or Successful) may appear.
Tap the "ESC" button to exit the function.